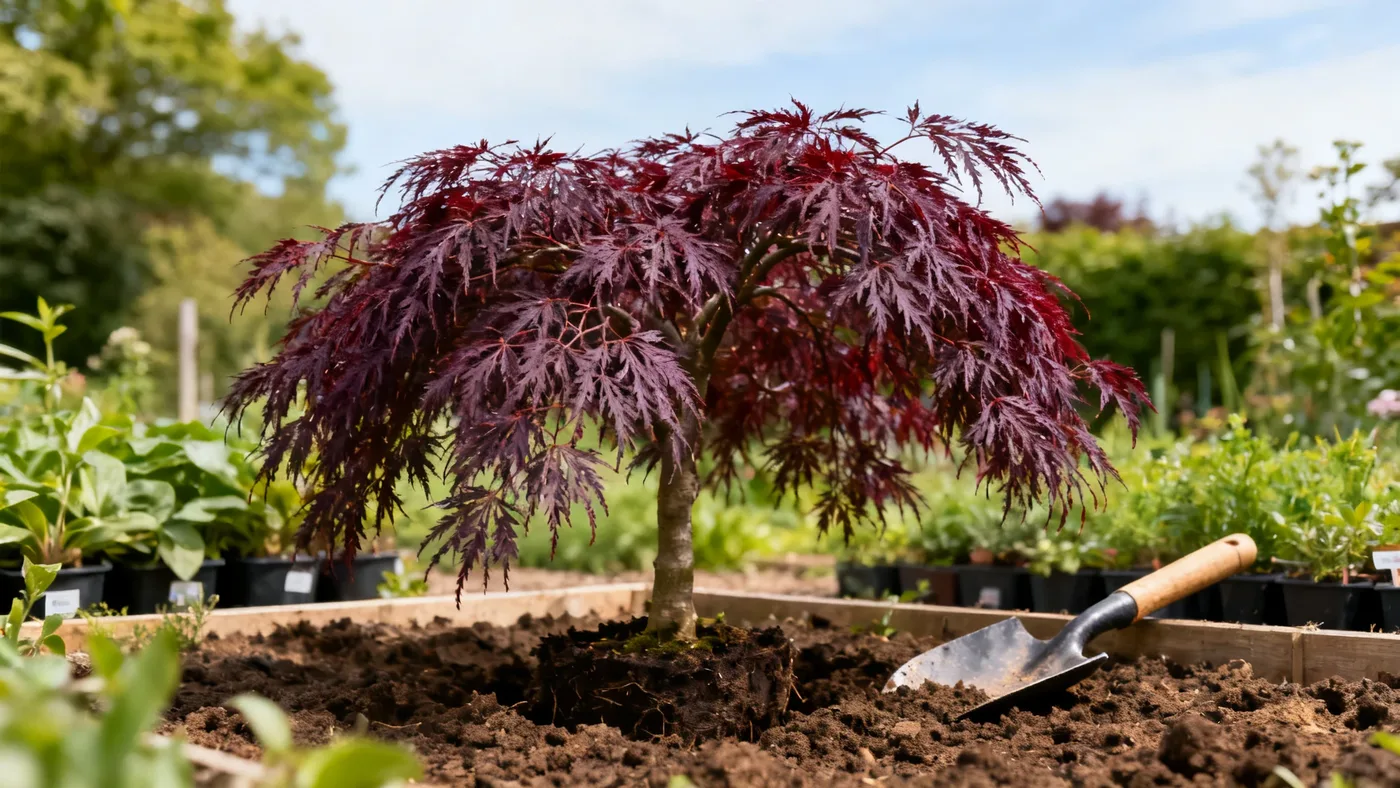
How to Plant a Tamukeyama Japanese Maple the Right Way
Planting a Tamukeyama Japanese Maple properly sets the stage for decades of graceful growth. This weeping cultivar develops its signature cascading form slowly but reliably when planted in the right spot with well-drained soil and consistent water. Unlike some ornamentals that forgive careless planting, Japanese maples reward careful site selection and hand attention during the first season.
Before You Plant: Site and Soil Requirements
The difference between a thriving Tamukeyama and a struggling one often comes down to planting decisions made before you dig. Start by evaluating your site against three factors: sunlight, drainage, and soil chemistry.
Light: Full Sun to Partial Shade
Tamukeyama thrives in full sun to partial shade. In cooler climates (zones 5-6), full sun is fine and actually encourages deeper red-purple color in the foliage. If you live in zone 7 or 8, afternoon shade is beneficial, especially if summers are hot. Hot afternoon sun without shade stress can lead to leaf scorch, which appears as brown or papery edges on the leaves. There is no way to reverse leaf scorch once it develops, so prevention through siting matters.
Soil: Well-Drained, Slightly Acidic Loam
This is non-negotiable. Japanese maples hate wet feet. The soil must drain quickly after rain or watering, or root rot will develop. The ideal soil is a rich, well-drained loam with a pH between 5.5 and 6.5 (slightly acidic to neutral). If you have heavy clay, you can still grow Tamukeyama, but you must amend the planting area aggressively. Some clay is tolerated if drainage is adequate, but "adequate" means water doesn't pool around the base even after heavy rain.
If your soil tests above pH 6.8, the tree may become chlorotic (yellowed leaves with green veins), a sign it cannot absorb iron in alkaline conditions. Your local extension service can provide a soil test for about 10 dollars; it takes two weeks and worth every penny for permanent plantings.
Spacing: 8-10 Feet from Other Trees
Tamukeyama spreads 8-12 feet wide at maturity, wider than it is tall due to the weeping habit. If you are grouping multiple Japanese maples or planting near other shrubs, space them 8-10 feet apart to avoid crowding. Air circulation reduces disease pressure and helps foliage dry quickly after rain.
Materials You'll Need
- A Tamukeyama Japanese Maple (typically sold in quart, #1, or #3 container sizes from nurseries)
- Compost or aged bark mulch (for amending the planting hole and as top dressing)
- Peat moss or coconut coir (optional, to improve drainage in clay soils)
- A shovel or spade
- Garden hose or watering can
- Landscape fabric or cardboard (optional, for weed suppression around the planting area)
- Wood mulch (2-3 inches deep for the top layer)
Step-by-Step Planting Instructions
Step 1: Choose the Right Time to Plant
Plant Tamukeyama in early spring (as soon as soil can be worked and before hot weather arrives) or in fall (starting six weeks before your first frost date). Avoid planting in midsummer heat or in winter during hard freezes. Young trees planted during temperature extremes face stress and root establishment delays. If you buy a tree in summer, hold it in a shaded spot and wait until fall to plant, or plant very early the following spring.
Step 2: Prepare the Planting Hole
Dig a hole about twice as wide as the root ball and just as deep as the root ball is tall. The key is to avoid planting too deep. The top of the root ball should sit level with or slightly above the soil surface, never buried. A tree planted too deep is prone to girdling roots and rot.
If your native soil is clay-heavy or compacted, dig the hole wider still and loosen the surrounding soil 12 inches beyond the planting hole to encourage roots to venture outward.
Step 3: Amend the Backfill Soil
Mix compost or aged bark mulch with the soil you removed from the hole. A ratio of one part compost to two parts native soil works well. This improves drainage and adds organic matter without completely changing the soil environment around the roots. Avoid pure compost or potting soil in the backfill, as it can create a "bathtub effect" where water pools in the planting hole instead of draining into the surrounding soil.
Step 4: Remove the Tree from Its Container
Gently slide the Tamukeyama out of its pot. If the roots are circling the inside of the container (girdling roots), loosen them by hand or make three vertical cuts along the root ball to encourage outward growth. Do not shred the entire root system; just break the circling pattern.
Step 5: Position the Tree in the Hole
Place the tree in the hole so that the top of the root ball is level with the ground. Step back and look at it from multiple angles to ensure it is upright and not leaning. The cascading branches of a Tamukeyama should fall naturally; this is not a tree you prop up or stake unless it is very young and top-heavy in a windy site.
Step 6: Backfill and Settle the Soil
Fill the hole halfway with the amended soil mix. Water gently to settle it and remove air pockets. Then fill the rest of the way and water again. Do not pack the soil hard; let water do the work of settling it. Compacted soil restricts root growth.
Step 7: Mulch the Base
Apply 2-3 inches of wood mulch around the base of the tree, keeping it 3-4 inches away from the trunk. Mulch keeps soil temperature stable, retains moisture, and suppresses weeds. Never pile mulch against the trunk; this traps moisture and invites pests and disease.
Step 8: Water Thoroughly
After planting, water the tree well. The goal for the first growing season is consistent moisture, never soggy. Young Tamukeyama need regular watering for at least the first year, especially if you planted in spring. Once the tree is established (after the second or third year), it will tolerate moderate drought, though it still prefers regular water.
Initial Care and Aftercare
The weeks and months right after planting are critical. Check soil moisture by inserting your finger 2-3 inches into the soil near the base. If it feels dry, water. If it feels wet, wait. In spring, this might mean watering two or three times per week. In cooler fall weather, less frequently.
Avoid fertilizing immediately after planting. The tree is focused on root establishment, not growth. After the first full growing season, you can apply a light feeding in early spring with a balanced, slow-release fertilizer formulated for woody ornamentals. Avoid excess nitrogen, which pushes weak growth and increases pest pressure.
Do not prune the tree the first year. Let it establish. Starting in late fall of the second year, you can remove any dead, crossing, or downward-growing branches if shaping is desired. Tamukeyama requires minimal pruning overall; resist the urge to sculpt it heavily, as this stresses the tree.
Common Mistakes to Avoid
Planting Too Deep
The most common error is burying the root flare (where the roots begin). This leads to girdling roots and trunk rot. The top of the root ball should be visible, not buried.
Poor Drainage
If your site has standing water after rain or if the soil drains very slowly, the tree will decline. Amend aggressively or choose a different location. No amount of aftercare fixes a drainage problem.
Wrong Season
Planting in midsummer when soil is hot and dry, or in winter when the ground is frozen, stresses young trees. Stick to early spring or fall.
Too Much or Too Little Shade
In zone 9 (which carries some uncertainty for this cultivar), full sun without afternoon shade can cause leaf scorch. In zones 5-6, shading the tree can delay leaf color development and reduce vigor. Match the light to your climate.
Mulch Piled Against the Trunk
Mulch volcanoes (mulch piled high around the trunk) trap moisture and invite pests. Keep mulch 3-4 inches away from the trunk.
What to Expect After Planting
Tamukeyama is a slow grower, adding roughly 6-12 inches per year. Resist the urge to compare it to fast-growing maples. The slow growth is part of what makes the architecture so fine; patience is rewarded with a mature tree that develops a graceful weeping silhouette over decades. It takes roughly 10-15+ years to approach full mature size of 6-10 feet tall and 8-12 feet wide.
You may notice some leaf discoloration or even slight wilting in the first few weeks after planting. This is normal transplant stress. As long as you are watering consistently and the soil drains well, the tree will recover. By the end of the first growing season, new growth should be vigorous and the tree should look established.
Fall color in the second and subsequent years may be more colorful than the first fall. The deep red-purple foliage holds color through summer better than many other dissectum cultivars, though it may green slightly in intense heat. By autumn, the tree will display crimson to scarlet red tones.
For more on maintaining your Tamukeyama year-round, see our complete growing guide.
Quick Reference: Planting Checklist
| Task | Timing / Detail |
|---|---|
| Select planting site | Full sun to partial shade; afternoon shade in zones 7-8 |
| Test soil | Confirm drainage is adequate and pH is 5.5-6.5 |
| Prepare planting hole | Twice as wide as root ball, same depth, loosened surrounding soil |
| Amend backfill | One part compost to two parts native soil |
| Loosen root ball | Break circling roots gently, do not shred |
| Plant at correct depth | Top of root ball level with or slightly above ground |
| Water and settle | Water twice during backfill, then after planting |
| Apply mulch | 2-3 inches, kept 3-4 inches from trunk |
| Water consistently | First season: regular moisture, never soggy |
| Skip fertilizer | First season; light spring feeding in year two |
| Skip pruning | First year; minimal pruning in late fall of year two onward |
| Expect growth rate | 6-12 inches per year; mature size in 10-15+ years |