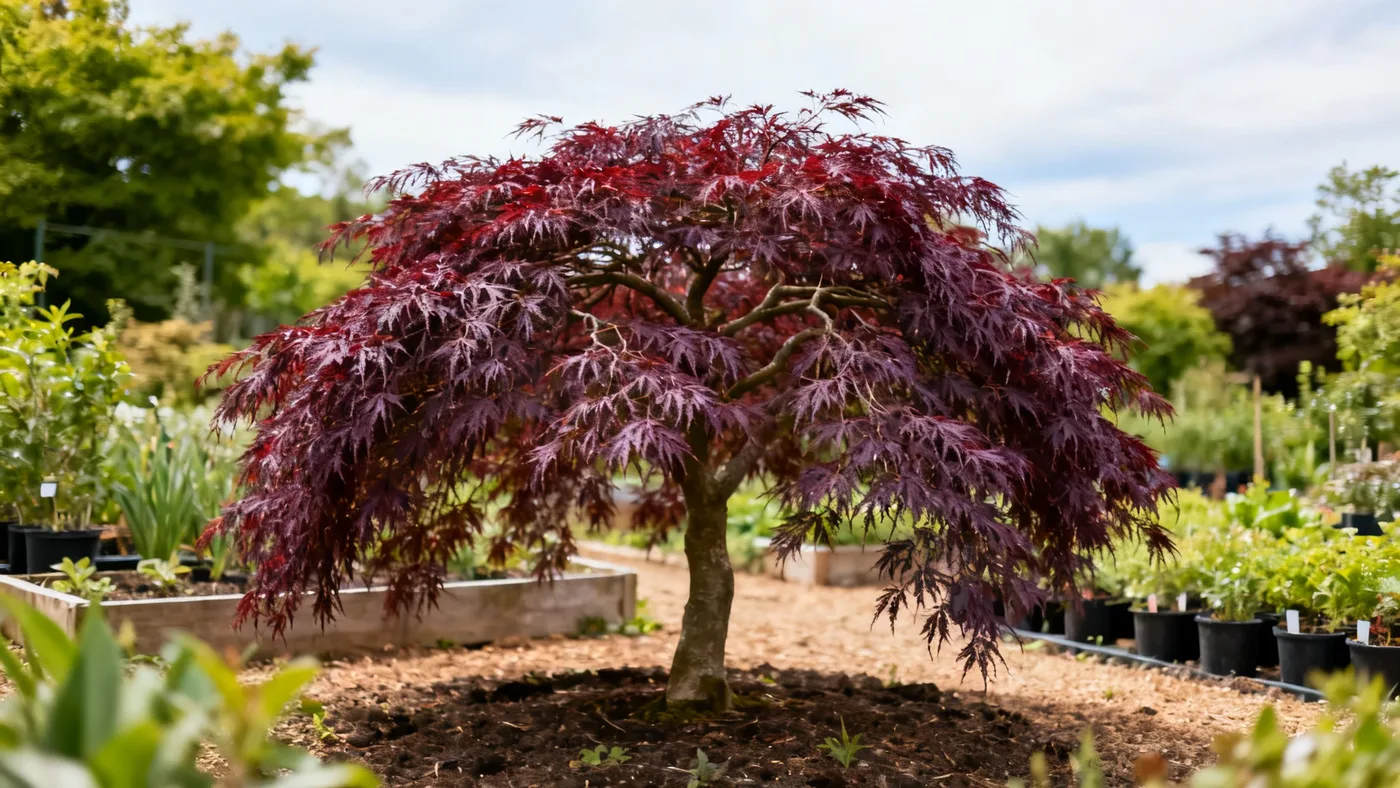
Winterizing Your Tamukeyama Japanese Maple in Cold Climates
Tamukeyama Japanese Maple thrives in USDA zones 5 through 8, but that cold-hardiness comes with a catch: young trees and container-grown specimens need active winter protection to avoid sunburn, frost crack, and root rot. Unlike deciduous trees that simply go dormant, Japanese maples are susceptible to temperature swings and harsh wind that can damage their fine lacy foliage, bark, and shallow root systems once winter arrives.
This guide walks you through winterizing your Tamukeyama, whether it grows in the ground or lives in a pot. Proper timing and materials make the difference between a tree that emerges healthy in spring and one that struggles through dieback or root loss.
Why Winter Protection Matters for Tamukeyama
Tamukeyama Japanese Maple has a weeping, cascading form that makes it visually striking year-round. That graceful silhouette, combined with its deep red-purple foliage during the growing season, comes at a cost: thin bark and relatively shallow roots that don't tolerate extreme temperature fluctuations as well as other shade trees do.
The main winter threats are:
- Sunburn and frost crack on the trunk. In zones 5 and 6, sunny winter days followed by freezing nights cause the bark to expand and contract, splitting the wood beneath. Young trees and newly planted trees are most vulnerable, especially on the south and west sides.
- Root damage in containers. Soil in pots freezes solid from all sides, and roots cannot access moisture or move deeper to escape frost. In zones 5 and colder, container roots can die even if the above-ground parts survive.
- Wind and ice damage to fine branches. Tamukeyama's lacy foliage and weeping branches accumulate ice and ice damage pruning scars that invite disease.
- Root rot from poor drainage during thaw cycles. Alternating freeze-thaw cycles can trap standing water against roots, inviting Phytophthora and other pathogens.
The good news: Most of these problems are preventable with straightforward winterization done before the hard freeze, typically by late October or early November in zones 5 and 6.
Materials You Will Need
- Tree guard wrap or white plastic spiral trunk wrap (4 to 6 inches wide, reflective white preferred)
- Burlap or frost cloth, 3 to 4 feet wide (optional but recommended for young trees in zones 5 and 6)
- Twine or landscape staples to secure wrapping
- 3 to 4 inches of mulch (bark chips, compost, or shredded leaves)
- Anti-desiccant spray (optional, for foliage protection in very dry winters)
- For container specimens: bubble wrap, cloth blankets, or a wood frame
- Well-draining potting soil (for refreshing container soil if needed)
Winterization Steps for In-Ground Trees
Step 1: Stop Fertilizing by August
Cease all feeding by late summer. Nitrogen fertilizer encourages tender new growth that cannot harden off before frost. If you fed your tree in early spring with a balanced, slow-release fertilizer for woody ornamentals, that is sufficient for the year. No additional feeding in fall or winter.
Step 2: Water Deeply in Late Autumn
Water your Tamukeyama thoroughly in October or early November, depending on your zone and rainfall. Moist soil conducts temperature more gradually than dry soil and provides roots with accessible water through early winter. Soak the root zone (out to the drip line) to a depth of 6 to 8 inches. Do not create standing water; the goal is consistent moisture in well-drained soil.
Step 3: Apply Mulch Around the Base
Once the ground begins to cool (late October to early November), add 3 to 4 inches of mulch around the base of the tree, keeping it 3 to 4 inches away from the trunk. Mulch insulates the shallow root system and slows freeze-thaw cycles. Use bark chips, shredded leaves, or compost. Do not mound mulch against the bark; that traps moisture and invites rot and rodent damage.
Step 4: Wrap the Trunk (Young or Newly Planted Trees)
Trees under 3 years old or newly planted specimens in zones 5 and 6 need trunk protection. Use white plastic spiral wrap or tree guard, starting at the base of the tree and spiraling upward to a height of 4 to 6 feet. White reflects winter sun and reduces the temperature swings that cause frost crack. Secure the wrap with twine or staples, but not so tightly that you girdle the bark.
Do not use dark-colored wrap or aluminum foil. Dark colors absorb solar heat during the day, making the temperature swing worse when the sun sets.
Step 5: Add Burlap Screen for Zone 5 (Optional but Recommended)
In zones 5 and colder, or for very exposed sites, drape burlap loosely around the lower branches of young trees. Use burlap stapled or tied to wooden stakes around the tree, or purchase a burlap tree shelter. The goal is not to completely enclose the tree (which traps heat and can cause disease) but to filter harsh wind and reduce ice accumulation on fine branches. Leave the top open to allow air circulation.
This step is optional for established trees in zones 6 through 8 but worth the effort for young specimens on windy sites.
Step 6: Monitor Through Winter and Remove Wrapping in Spring
Check wrapping in late winter (February) to ensure it has not loosened or torn. Do not leave wrap on past early spring; as days lengthen, the sun intensity increases and wrap can trap heat and damage bark. Remove all wrapping by late March or early April, depending on your zone. Remove mulch from immediately around the trunk once temperatures consistently rise above freezing in spring.
Winterization Steps for Container-Grown Tamukeyama
Containerized trees need extra attention. Soil in pots freezes from all sides and thaws unpredictably, and roots cannot migrate deeper to escape frost. Follow these steps:
Step 1: Move to a Sheltered Microclimate
In zones 5 through 7, move your container-grown Tamukeyama to a location that receives afternoon sun but is protected from harsh north and west winds. A south-facing wall, under an eave, or near a fence is ideal. If you must leave it in an exposed location, proceed to Step 2.
Step 2: Insulate the Pot
Wrap the entire pot in 2 to 3 layers of bubble wrap, securing with twine. Alternatively, place the pot inside a larger decorative planter and stuff the space between with straw, leaves, or packing material. The goal is to slow soil freezing. Do not wrap the foliage or trunk at this stage; air must circulate around the canopy.
Step 3: Mulch the Top of the Soil
Cover the soil surface in the pot with 2 to 3 inches of mulch or shredded leaves. This insulates roots at the top of the container, where freezing is most severe.
Step 4: Wrap the Trunk if Needed
If the tree is young (under 3 years) or in zone 5, apply white tree guard wrap to the trunk as described in the in-ground section above.
Step 5: Water Carefully Through Winter
Water only when soil is dry to the touch and outdoor temperatures are above freezing. Waterlogged soil in a frozen pot is a recipe for root rot. In most winters, November through February rains provide sufficient moisture. Resume regular watering in spring.
Tips and Common Mistakes to Avoid
- Do not over-wrap. Wrapping the entire tree in burlap or plastic creates a microclimate that can trap heat and humidity, inviting fungal disease and splitting. Keep wrapping loose and breathable.
- Do not use dark-colored or reflective-backed wrap on the trunk. These amplify solar heat during the day and make frost crack worse. White is the correct choice.
- Do not leave mulch mounded against the trunk. Mulch against bark holds moisture and encourages rodent nesting. Keep a 3-inch gap between mulch and bark.
- Do not prune in fall or winter for cosmetic reasons. If pruning is necessary, prune in late fall through winter dormancy to remove dead, crossing, or downward-growing branches. Avoid heavy pruning, which stresses the tree. Refer to our pruning guide for detailed technique.
- Do not forget container trees. Container-grown specimens are far more vulnerable than in-ground trees and need protection in all zones 5 through 8. An insulated pot and sheltered microclimate reduce winter loss significantly.
- Do not leave wrapping on past spring. White plastic wrap left on too long can trap excessive heat and damage bark. Remove by late March or early April.
Expected Results and Timeline
A properly winterized Tamukeyama should emerge in spring with a fully intact canopy and no visible sunburn, frost crack, or dieback on the trunk. Buds break in April and May (depending on your zone), and new growth begins immediately. The tree may appear slow to leaf out compared to other plants, but this is normal; Japanese maples are late to break dormancy.
If your tree was exposed to very harsh conditions or extreme temperature swings, it may show some branch dieback or delayed leafing. In mild cases, the tree recovers within one season. For more context on year-round care and the tree's full growth cycle, read our complete growing guide.
Spring is also when you can appreciate the full beauty of your Tamukeyama's winter silhouette. Before new leaves emerge, the graceful weeping branches and fine bark texture are fully visible. If you want to capture this aesthetic during the dormant season, that brief window (late February to early April, before buds swell) is ideal.
Winterization Quick Reference
| Task | Timing | In-Ground Trees | Container Trees |
|---|---|---|---|
| Stop fertilizing | Late August | Yes | Yes |
| Water deeply | October to early November | Yes | Yes (water less frequently Nov-Feb) |
| Apply mulch to base | Late October to early November | 3-4 inches, 3 inches from trunk | 2-3 inches on soil surface |
| Wrap trunk (young trees) | Late October to early November | White wrap, zones 5-6, under 3 years old | White wrap, all zones, under 3 years old |
| Add burlap screen (zone 5) | Late October to early November | Loose around lower branches, top open | Optional; prioritize pot insulation |
| Insulate pot | Late October to early November | N/A | Bubble wrap or mulch in larger planter |
| Shelter from wind | October through April | Optional, for exposed sites | South-facing wall or fence, all zones |
| Check wrapping | Late February | Inspect for damage or loosening | Inspect pot insulation |
| Remove all wrapping | Late March to early April | Remove wrap and mulch from trunk area | Remove pot wrap and trunk wrap |
Winterization is an investment in your Tamukeyama's long-term health and vigor. Japanese maples are long-lived trees, commonly living 50 to 100+ years with proper care. A few hours of preparation in fall prevents the stress and dieback that can set a tree back years. Once your Tamukeyama is established and hardened off (typically after 3 to 4 winters), winter protection can be scaled back, though container trees will always benefit from insulation in zones 5 and 6.
For a deeper dive into year-round care, check out why your Tamukeyama's fall-color turns fiery crimson, and refer back to this guide each autumn as your winterization routine becomes second nature.