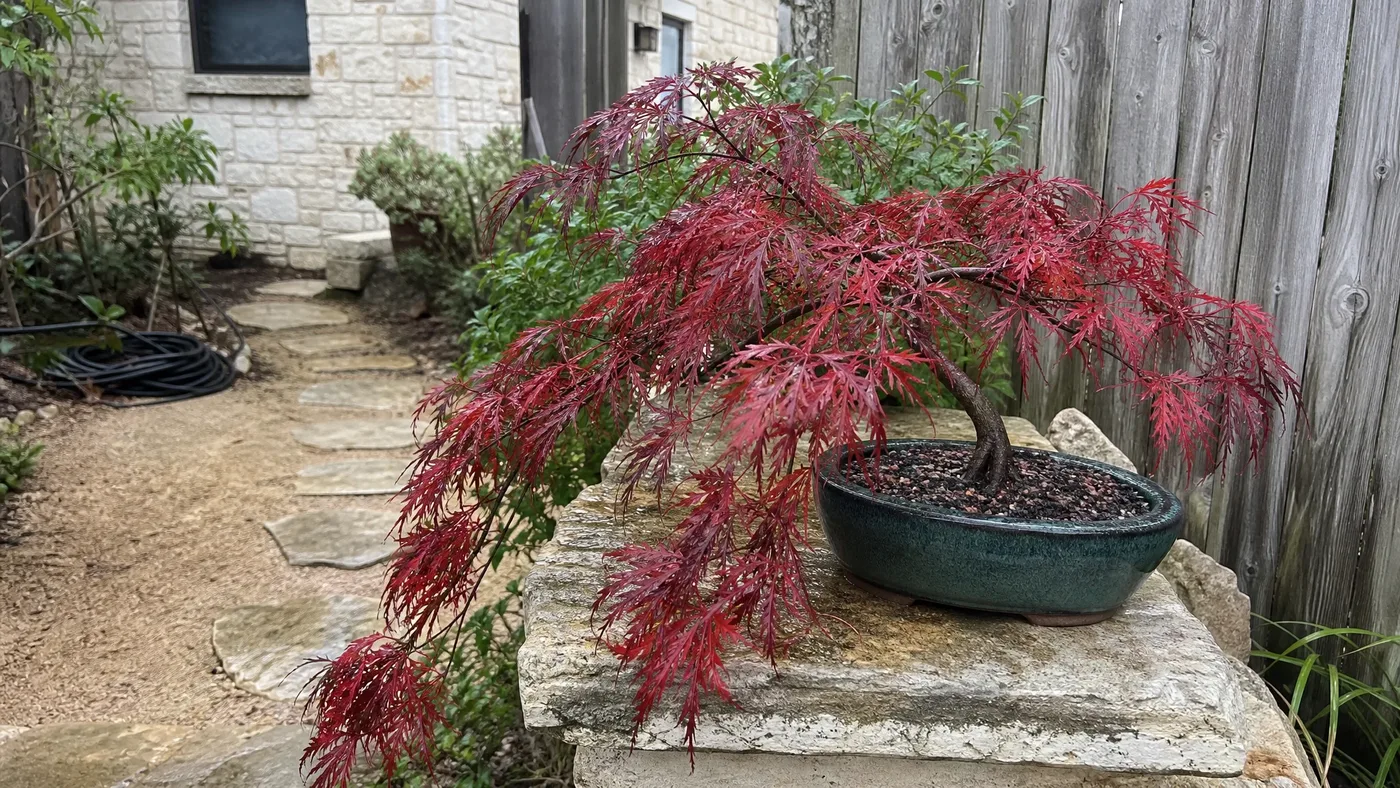
Tamukeyama Japanese Maple Bonsai: Styling a Weeping Laceleaf
Before you bend a single branch, price out five years of a single pot, a tree and a wire spool. The wire is the cheapest line on that list. The tree and the pot set the rest of the plan, and a Tamukeyama punishes a rushed start because a laceleaf grows slowly. Every season lost to a bad choice is a season you do not get back.
Done badly, you end up with a trunk that has no line to follow, a pot the tree outgrows, and leaves far too large for the container. Done well, you get a weeping, cascading tree that the usual upright maple bonsai cannot match.
In this article, we'll go through choosing a starter tree, budgeting years and money, setting the cascade, scaling leaves to the pot, repotting, and trimming for fine twigs.
Choosing a Tamukeyama Japanese Maple Starter Tree
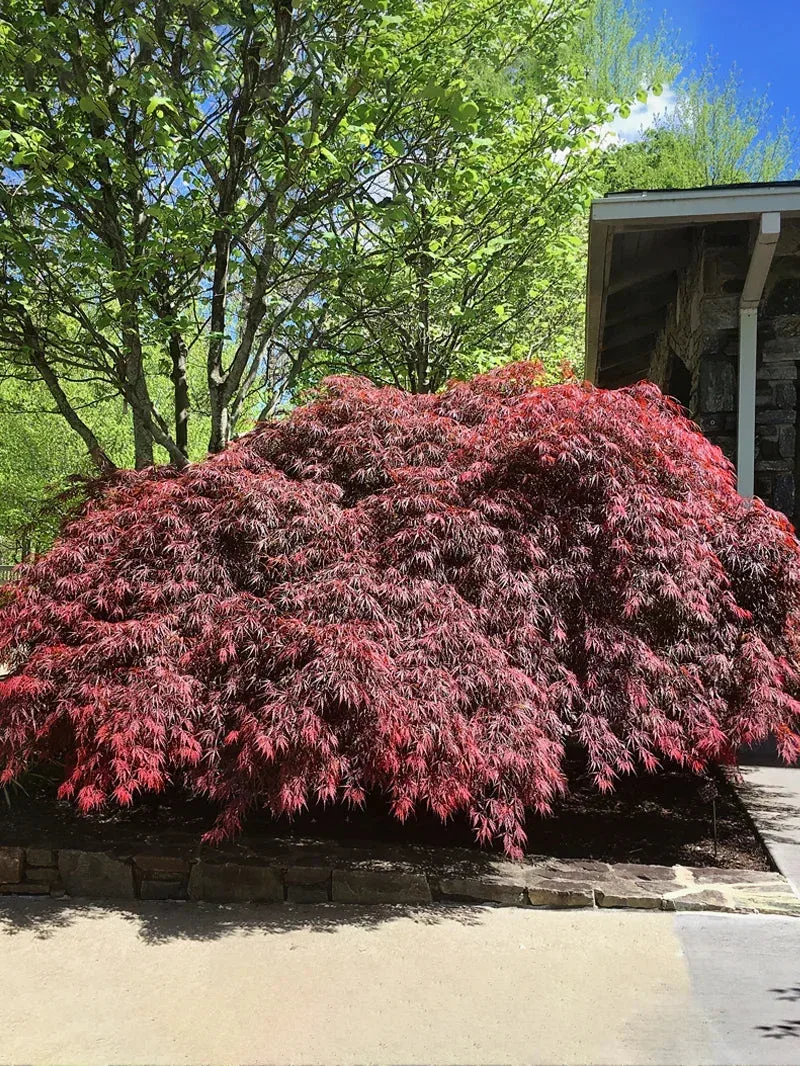
Most Japanese maple bonsai start from upright, broom-shaped trees. Tamukeyama is a laceleaf with a mounded, weeping habit and deeply divided leaves, so it wants a different kind of starting plant. You are looking for a young tree that already hints at the shape you want, not one you have to argue into it.
Left alone, this cultivar reaches roughly 5–8 feet, in line with extension notes that cutleaf maples usually stay under eight feet. That is small for a landscape tree and huge for a pot, which is why the starter matters. Check these things in the nursery row:
- A trunk with some bend or lean near the base. A perfectly straight trunk gives you nothing to build a cascade from.
- Branches that already droop away from the trunk rather than shooting straight up.
- Clean, evenly colored leaves and no dead twigs inside the canopy. Dieback this early often means a root problem.
- A container that is not packed solid with circling roots, since you will be root pruning soon enough.
A thin-trunked young plant costs less and gives you years of cheap shaping. A thick-trunked one costs more and saves time. We lean toward the younger plant for a first bonsai, because you learn on a tree you can afford to make mistakes with.
Budgeting Years and Dollars for Bonsai
Treat this as a five-year plan rather than a weekend project. The spending is front-loaded and small after that, while the time cost never really drops. One of the most common questions we get is whether paying more for a bigger tree skips the waiting. It skips some of it, but the fine twigs still have to be grown on your schedule, not ours.
The table lays out where the money and effort go. We have left prices out on purpose, since pots and tools vary widely, so price each line locally before you commit.
| Stage | What you buy | What you do |
|---|---|---|
| First year | The tree, a roomy training pot, bonsai soil | Let the tree settle and study the trunk line |
| Second year | A wire spool in two or three thicknesses, cutters | Wire the main branches and start the cascade |
| Third year | A shallower bonsai pot | First real repot and root reduction |
| Fourth and fifth years | Very little | Pinch, thin and refine the pads |
The trade-off is simple. A cheap pot now means a second pot later, so decide early whether the tree will live in a plain training container for the first stretch. Our guide to growing Tamukeyama in pots covers general container care, which you will need alongside everything here.
Setting the First Trunk Line and Cascade
Do the structural thinking in the first year, and do the cutting and wiring in dormancy, when the bare branches show you what you have. Our pruning guide goes into the timing in more detail.
Find the Front and the Flow
Turn the tree slowly and pick the side where the trunk curves most and the branches fall most naturally. That becomes the front. The trunk line is the path your eye follows from the soil to the top, and in a cascade that path should travel outward and then down.
Commit to a Cascade Style
A true cascade lets the apex drop below the bottom of the pot, so it needs a tall container and a bench or stand that lets the branches hang. A semi-cascade, where the tip falls to or just below the rim, is more forgiving and suits a Tamukeyama well, since the foliage already droops on its own.
Whichever you pick, choose now. Changing your mind in year three means rewiring the trunk, and a laceleaf's slow growth makes every correction expensive. Keep the cascade branch the thickest and let the upper branches stay lighter, so the weight reads as falling.
Matching Leaf Size to the Pot
This is where Tamukeyama is harder than most Japanese maples. Its leaves are large for bonsai scale, and a slow-growing laceleaf does not respond to leaf reduction as quickly as a vigorous tree does. Sources describe the growth as slow to medium, and faster when young, which is a good argument for starting with a young plant and not waiting.
The leaves will never shrink to the size of a trident maple's, so accept that now and scale everything else around it. A larger pot makes a laceleaf look like a landscape plant in a bucket. A pot in proportion to the foliage mass, wide enough to balance the drooping crown, makes the leaves look deliberate.
Three things shrink leaves gradually. A tighter root system in a smaller pot, a gentle feeding schedule, and good light, with morning sun and afternoon shade. Heavy nitrogen pushes big, soft growth and can lead to leaf scorch. Our sun and shade guide explains how to give the tree light without scorching those fine leaves.
A common piece of advice is to strip every leaf each summer to force smaller ones. We do not suggest it on a slow laceleaf, since the tree spends its reserves regrowing and falls behind on the thing you actually want, which is wood and structure.
Shaping an Informal Weeping Form
Informal weeping is the style this cultivar wants to be in. The trunk leans or curves, the branches fall in layers, and the foliage forms soft pads rather than a tidy dome. You are guiding the natural droop and not fighting it.
Wire in dormancy, after the leaves drop, when you can see every branch. Laceleaf bark is thin and the twigs are slender, so use wire thinner than you first think and handle each branch slowly. Work in this order:
- Anchor the wire in the soil or around the trunk, so it holds without sliding.
- Wrap the branch at a shallow, even angle, with no gaps and no crossing over itself.
- Bend the branch a little at a time, supporting it with your thumbs at the bend.
- Check the wire often once growth starts. Thickening wood will cut into the bark faster than you expect.
- Remove the wire as soon as the branch holds its shape, snipping it off in pieces and never unwinding it.
Wire marks on this thin bark can last for years, so we would sooner remove wire early and rewire than leave it on. Between wiring sessions, leave gaps between the branch layers. Light has to reach the inner twigs, or they die and you lose the ramification you are building.
Repotting Your Tamukeyama Japanese Maple Every Few Years
Repotting is how a bonsai stays small and healthy at the same time. The root mass has to be trimmed and refreshed before it fills the pot. A young tree in a training pot fills it sooner, so it needs repotting more often. An older tree in a shallow pot can go longer. Slide the tree out and look, and repot when roots circle the edge and the soil drains slowly.
Do it in late winter, just before the buds swell. The good news is that container-grown and root-pruned Japanese maples transplant well, so a tree that has lived in a pot is a fair candidate. The steps:
- Water the tree the day before so the roots are supple.
- Slide the tree out and comb the outer roots free with a chopstick or root hook.
- Trim back the outer roots evenly and keep the fine feeder roots near the trunk.
- Set the tree in the new pot on a mound of fresh soil and wire it in place.
- Work soil between the roots, water thoroughly and keep the tree out of wind and hard frost.
Use a mix that stays moist but drains freely, and keep it on the acid to neutral side. High pH soil causes chlorosis, a yellowing that is miserable to fix in a small pot. After repotting, keep the tree in shade for a while and water carefully. Our watering guide helps you avoid both drought and soggy roots.
Trimming for Fine Ramification on Tamukeyama Japanese Maple
Ramification means fine, branching twigs, and it is what makes a bonsai look old. On a weeping laceleaf it also keeps the pads from turning into a mop. Two kinds of work build it, and they run on different calendars.
Cutting Back and Thinning
Do the real cuts in dormancy. NC State advises that pruning is best kept to a minimum and done in late fall to mid-winter, because spring or summer cuts bleed heavily. Another university source notes that one expert likes summer pruning, with early winter also acceptable, so check what your local extension office says for your zone. We stay with dormancy for anything thick.
When thinning, follow the advice to remove dead or dying branches, working from the bottom up and the inside out. Cut back to a bud or a fork and not to a stub, and take out any twig that crosses or grows straight up through a pad.
Pinching Soft Growth
Through the growing season, pinch the tips of new shoots with your fingers once they have extended and before they harden. Each pinch encourages the shoot to split into two, which doubles the twigs over time. Leave the strongest shoots on the cascade branch a little longer so it keeps its weight, and pinch the weak inner growth more lightly. In our rows, the trees that get regular small pinches always look finer than the ones that get one big haircut.
What a Finished Tamukeyama Japanese Maple Bonsai Takes
The whole job comes down to a few decisions made early and kept. Start with a young tree that already droops, choose the cascade or informal weeping style in year one, and keep the pot in proportion to the leaves. Repot on the tree's schedule, wire in dormancy, and pinch lightly all season.
Be realistic about the timeline. On a five-year plan, expect the tree to first look like a bonsai around the third year, once it has a set trunk line, a shallow pot and its first cascading pads. The fine twigs and the settled look of an old tree come in the fourth and fifth years and keep improving after that.
Tamukeyama Japanese Maple
Nursery-grown Tamukeyama Japanese Maple in sizes from 5 Pot 2-3 ft, shipped to your door.
From $182.10
Shop Now →Bonsai or not, a weeping laceleaf lives on what its roots and leaves get, so we raise every Tamukeyama on our farms in part shade, in soil that holds moisture and still drains freely. We are a small business of growers, and we raise each top-quality tree we sell from start to finish. If you want a cascade to shape over the next five years, choose one of ours as your starting tree.