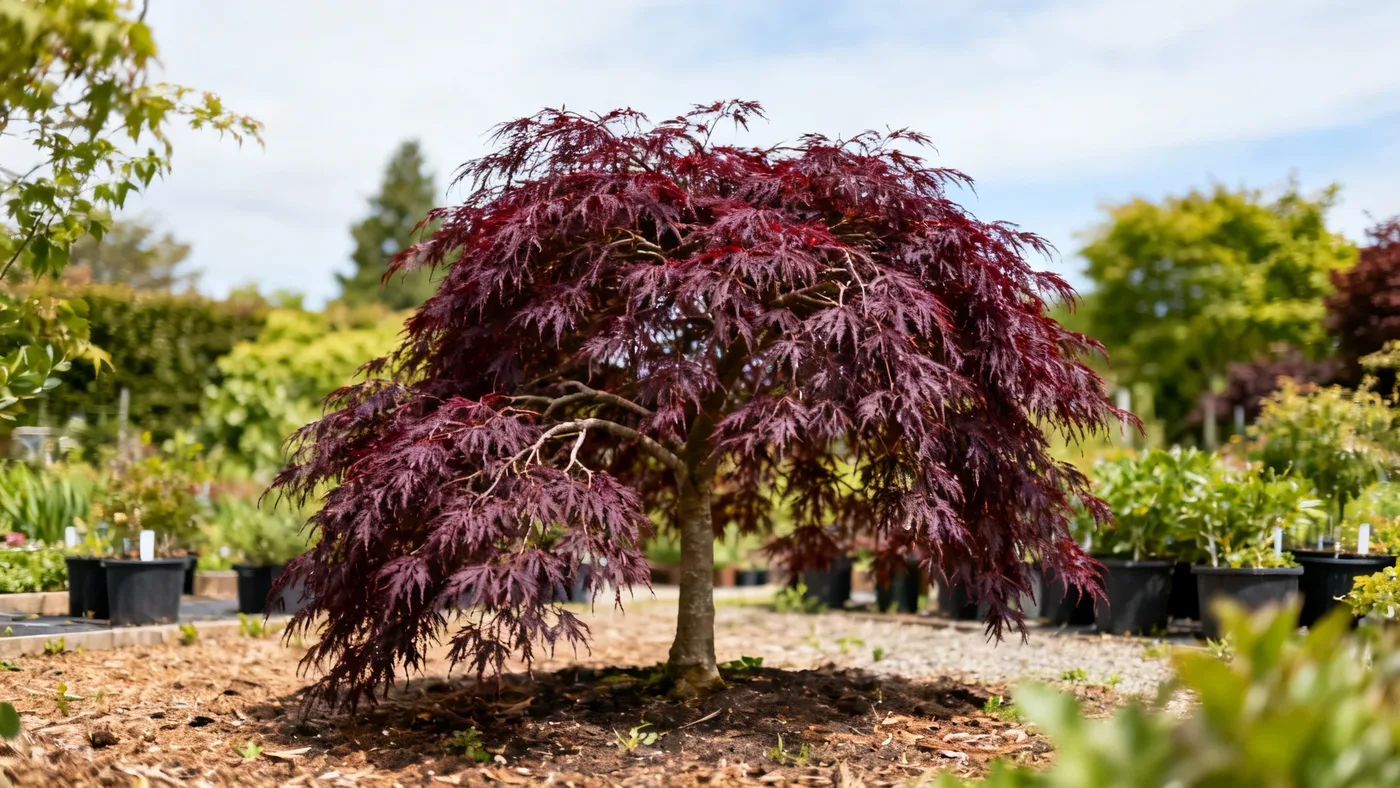
Best Soil for a Tamukeyama Japanese Maple to Thrive
Your Tamukeyama Japanese Maple's success depends as much on what's below ground as what's above it. Soil is where the roots absorb water and nutrients, anchor the plant, and interact with beneficial microorganisms. Get this right, and your maple thrives for decades. Get it wrong, and you risk root rot, nutrient deficiencies, and stunted growth.
This guide walks you through assessing your soil, amending it to match the plant's needs, and maintaining it over time. Whether you're planting in the ground or in a container, these principles apply.
Why Soil Matters for Tamukeyama Japanese Maple
Tamukeyama is a slow-growing cultivar. At roughly 6 to 12 inches per year, it can take 10 to 15 or more years to approach its mature size of 6 to 10 feet tall and 8 to 12 feet wide. During that long establishment period, the roots need a stable, forgiving medium. Poor soil forces the roots to work harder and stresses the plant, slowing growth even further and inviting pests and disease.
Root rot caused by Phytophthora and waterlogging is one of the most common problems in Japanese maples. Tamukeyama's fine, lacy root system is especially sensitive to standing water. At the same time, the plant needs consistent moisture, not drought. The solution is a soil that drains quickly but holds adequate water. This balance is achievable and worth the upfront effort.
The Ideal Soil Profile
Tamukeyama thrives in rich, well-drained loam. The soil should also be slightly acidic to neutral, in the range of 5.5 to 6.5 pH. This range allows roots to access essential nutrients and prevents nutrient lock-up, which manifests as yellowing leaves (a condition called chlorosis) when soil pH climbs too high.
Good news: the plant tolerates some clay in the mix as long as drainage is adequate. You don't need pure sand or an expensive specialty blend. You need structure, organic matter, and the right pH.
Testing Your Soil
Before amending, test your existing soil. This takes the guesswork out of how much material you need to add.
Visit your local county extension office or use a mail-in soil testing kit. They'll measure your soil's texture (percentage of sand, silt, and clay), pH, nutrient content, and sometimes organic matter percentage. The cost is usually between 15 and 40 dollars, and results arrive in 1 to 3 weeks.
If your pH is above 7, your soil is alkaline and needs acidifying amendments. If it's below 5.5, it's very acidic and may need lime. If your soil is compacted clay with poor drainage, you'll need to add compost, peat moss, or aged bark to open it up.
Materials and Amendments You'll Need
Gather these materials before you begin. Amounts depend on your soil test results and the planting area's size, but the ingredients remain consistent.
- Compost or aged bark mulch (to improve drainage and add organic matter)
- Peat moss or coconut coir (to improve water retention while maintaining drainage)
- Native topsoil or loam (the base layer)
- Sulfur powder or an acid-forming fertilizer (if your soil pH is above 6.5)
- A soil testing kit or results from your extension office
- Garden spade or shovel
- A wheelbarrow
- A garden fork or tiller (for larger areas)
- Gloves and a dust mask
Step-by-Step Soil Preparation
Step 1: Prepare the Planting Area
Mark out a circle or square at least 3 feet in diameter for an in-ground planting. This gives the roots room to spread without competing with established plants nearby. For containers, ensure the pot is at least 18 to 24 inches deep and has drainage holes in the bottom.
Step 2: Remove Existing Soil or Substrate
Dig out the top 12 to 18 inches of soil in your planting area. This is where you'll blend in amendments. If the soil below is hard clay, break it up slightly with a fork to allow drainage from the planting hole downward.
Step 3: Test and Adjust pH
Using your soil test results, calculate how much sulfur to add if your pH is above 6.5. As a general rule, adding 1 pound of sulfur per 100 square feet lowers pH by approximately 1 point, though this varies with soil type. Always follow your test's recommendations. Mix the sulfur into the soil thoroughly and wait 2 to 4 weeks before planting if possible, so the amendment can react fully with the soil.
Step 4: Blend in Organic Matter
Spread a 3 to 4 inch layer of high-quality compost or aged bark mulch over the prepared area. Add 2 to 3 inches of peat moss or coconut coir. Mix these amendments into the top 12 inches of soil using a garden fork or tiller. The goal is to create a uniform, crumbly texture. You're aiming for roughly 25 to 40 percent organic matter by volume in the top 12 inches.
Step 5: Verify Drainage
Dig a small hole in the amended area and fill it with water. It should drain within 1 to 2 hours. If water is still present after 2 hours, you need more coarse material (bark, compost, or sand) to improve drainage. Do not proceed to planting until drainage is acceptable.
Step 6: Level and Plant
Rake the amended soil smooth. Dig a planting hole slightly wider and no deeper than the root ball of your Tamukeyama. Loosen the roots gently and set the tree in the hole so the top of the root ball sits level with the ground surface. Backfill with amended soil, gently firming it as you go. Do not compress hard; air pockets are good.
Step 7: Mulch and Water
Spread 2 to 3 inches of bark mulch around the base, keeping it a few inches away from the trunk to prevent rot. Water deeply and slowly so the soil settles without creating air pockets. The soil should feel evenly moist, not waterlogged or dry.
Soil Amendments for Container Planting
Container-grown Tamukeyama needs the same pH range (5.5 to 6.5) and drainage profile as in-ground trees, but the mix is more concentrated. A good recipe is equal parts high-quality potting soil, compost, and peat moss or coconut coir, with a handful of coarse bark or perlite for additional drainage. Use a pot at least 18 to 24 inches deep with drainage holes. Container plants dry out faster, especially in warm weather, so check the soil's moisture level 2 to 3 times a week and water when the top inch feels dry.
Common Mistakes to Avoid
Amending soil without testing first. You might add sulfur when your pH is already perfect, or skip it when it's critical. A 30 dollar test saves months of stunted growth.
Planting too deep. The most common cause of root rot in Japanese maples is soil mounded up around the trunk or the tree set too low in the hole. The top of the root ball should sit flush with the ground surface.
Over-mulching. More than 3 inches of mulch traps moisture against the trunk and can invite fungal rot. Pull mulch back a few inches from the stem.
Ignoring drainage. If water pools or drains very slowly, amending with compost alone won't fix it. You need coarser material like bark chips or structural amendments that stay open over time.
Using alkaline amendments. Wood ash, lime, and some composts raise pH. Always check amendment bags for pH impact before mixing them in.
Long-Term Soil Maintenance
After planting, refresh the mulch layer annually in spring. Organic mulch breaks down and enriches the soil, which is good, but it also thins over time. Add 1 to 2 inches yearly to maintain the 2 to 3 inch depth.
Every 3 to 4 years, consider a light feeding with a balanced, slow-release fertilizer formulated for acid-loving ornamentals. Avoid excess nitrogen, which pushes weak, fast growth at the expense of structure. Follow the label rate for container or landscape application.
Monitor your tree for signs of nutrient deficiency (yellowing leaves, stunted growth) or drainage problems (wilting despite wet soil, soft roots, fungal growth on the trunk). These warrant a soil re-test and adjustment.
Companion plants can also signal soil health. Azaleas, hostas, ferns, and heuchera thrive in the same soil conditions as Tamukeyama. If they're healthy nearby, your soil is likely in good shape.
Expected Results
Well-prepared soil won't make a slow-growing Tamukeyama suddenly grow fast. It will show 6 to 12 inches of new growth per year, consistent with the cultivar's natural rate. What good soil does is prevent the setbacks that hold slower maples back even further. Your tree will establish a strong root system, resist pests and disease, and maintain deep red-purple foliage throughout the growing season. The leaves should hold their color well in summer, even in warm climates, and turn scarlet in fall.
Quick Soil Reference Checklist
| Soil Factor | Target Range or Action |
|---|---|
| pH | 5.5 to 6.5 (slightly acidic to neutral) |
| Texture | Rich, well-drained loam; tolerates some clay if drainage is adequate |
| Drainage Test | Water in planting hole drains within 1 to 2 hours |
| Organic Matter | 25 to 40 percent by volume in top 12 inches |
| Mulch Depth | 2 to 3 inches; keep a few inches back from trunk |
| Container Depth | 18 to 24 inches minimum |
| Watering Frequency | Regular, consistent moisture; containers 2 to 3 times weekly during growth |
| Fertilizing | Light, balanced slow-release formulation for acid-loving ornamentals every 3 to 4 years |
| Re-testing | Every 3 to 4 years, or if problems appear |
| Signs of Problems | Yellowing leaves (alkaline soil), wilting on wet soil (poor drainage), stunted growth (low nutrients or pH mismatch) |
For comprehensive care guidance beyond soil, including watering schedules, pruning, and seasonal tasks, see our complete Tamukeyama care guide. To understand the mature size and spacing of your tree, read about how large Tamukeyama grows.